> ## Documentation Index
> Fetch the complete documentation index at: https://help.tiretutor.ai/llms.txt
> Use this file to discover all available pages before exploring further.
# Adding a vehicle
> Add vehicle details to a work order or estimate with a lookup or manual entry.
Start from the **Vehicle Details** card on the work order or estimate. The customer page has no vehicle entry.
## Open the vehicle dialog
Open the work order or estimate.
Find **Vehicle Details**.
Select **Change Vehicle**.
In **Select Vehicle**, select **New Vehicle**.
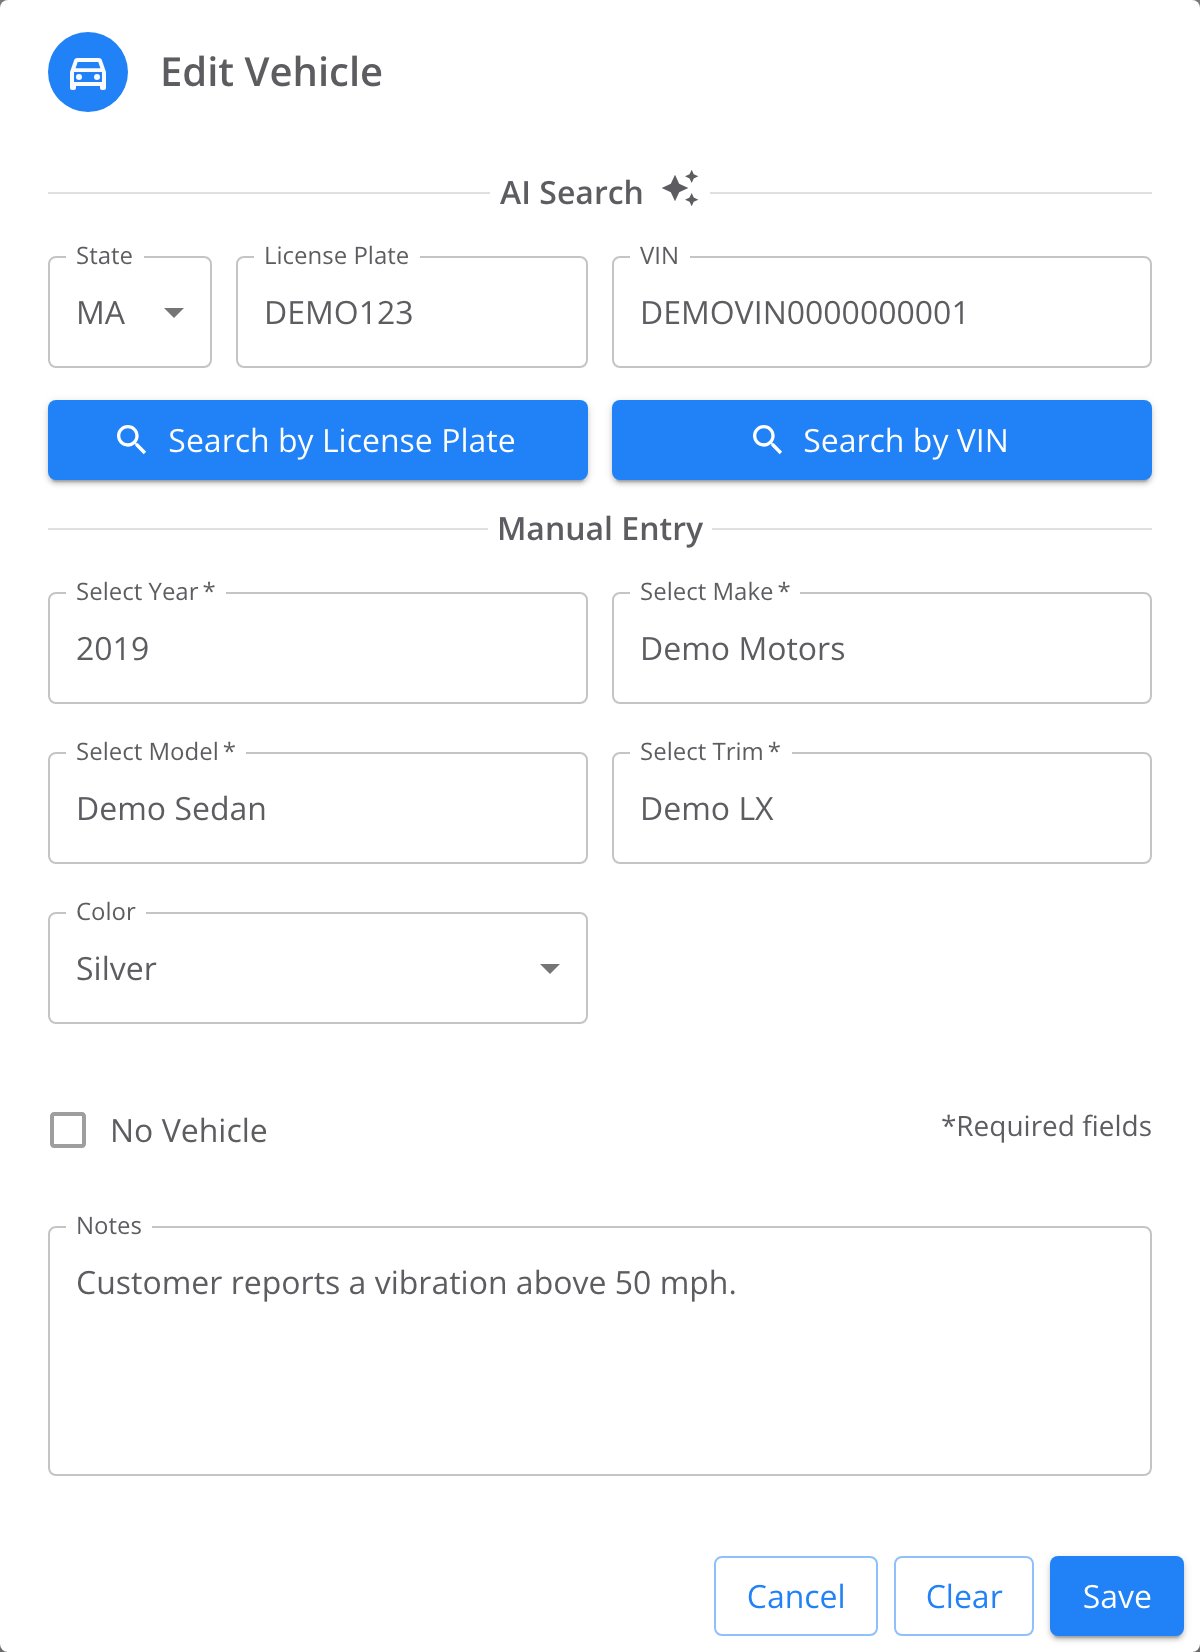
The **Edit Vehicle** dialog has **AI Search** and **Manual Entry** sections.
 ## Look up the vehicle by VIN
Enter 13 to 17 characters in **VIN**.
Select **Search by VIN**.
When the match alert appears, select **Fill Form**.
Check **Select Year**, **Select Make**, **Select Model**, and **Select Trim**.
## Look up the vehicle by license plate
Choose the plate's state in **State**.
Enter the plate number in **License Plate**.
Select **Search by License Plate**.
When the match alert appears, select **Fill Form**.
Check the VIN and the fields under **Manual Entry**.
If a lookup finds no vehicle, enter the details under **Manual Entry**.
## Enter the vehicle manually
Complete **Select Year**, **Select Make**, **Select Model**, and **Select Trim** in order.
Complete **Color** and **Notes** when you have those details.
When you open the dialog from a work order, it also shows a **Mileage In** field. Some shops require **VIN** and **Mileage In** on work orders. The dialog shows an error on Save when a required field is empty. A state and license plate also satisfy the VIN requirement. The picture above shows the dialog opened from a quote, without **Mileage In**.
Select **Save**.
Select **No Vehicle** only when the order does not need a vehicle. The dialog also has **Cancel** and **Clear**. **Cancel** closes the dialog. **Clear** empties the form to its defaults.
TireTutor shows **Successful submission**. The vehicle appears in **Vehicle Details** on the order.
## Where to go next
Add a service writer and technician to the work order.
Understand how estimates, work orders, and payments fit together.
## Look up the vehicle by VIN
Enter 13 to 17 characters in **VIN**.
Select **Search by VIN**.
When the match alert appears, select **Fill Form**.
Check **Select Year**, **Select Make**, **Select Model**, and **Select Trim**.
## Look up the vehicle by license plate
Choose the plate's state in **State**.
Enter the plate number in **License Plate**.
Select **Search by License Plate**.
When the match alert appears, select **Fill Form**.
Check the VIN and the fields under **Manual Entry**.
If a lookup finds no vehicle, enter the details under **Manual Entry**.
## Enter the vehicle manually
Complete **Select Year**, **Select Make**, **Select Model**, and **Select Trim** in order.
Complete **Color** and **Notes** when you have those details.
When you open the dialog from a work order, it also shows a **Mileage In** field. Some shops require **VIN** and **Mileage In** on work orders. The dialog shows an error on Save when a required field is empty. A state and license plate also satisfy the VIN requirement. The picture above shows the dialog opened from a quote, without **Mileage In**.
Select **Save**.
Select **No Vehicle** only when the order does not need a vehicle. The dialog also has **Cancel** and **Clear**. **Cancel** closes the dialog. **Clear** empties the form to its defaults.
TireTutor shows **Successful submission**. The vehicle appears in **Vehicle Details** on the order.
## Where to go next
Add a service writer and technician to the work order.
Understand how estimates, work orders, and payments fit together.