

Open the service search
1
Open the work order or estimate
Open the work order or the estimate that needs the work.
2
Select the search box
In Labor and Parts Lookup, select Search or browse all services.
3
Open the results
Type a job, or leave the box empty. Press Enter or select Add Service.
Search MOTOR and narrow the results
Press Enter to search MOTOR. Then type more words to narrow the results.1
Type a job
Type a job in the search bar, for example “brake”. As you type, the list narrows to the services already loaded. The line under the bar says what Enter does.
2
Ask MOTOR
Press Enter. MOTOR searches for the job, and the word becomes a solid MOTOR chip in the bar.
3
Type a word to narrow the results
Type another word, for example “front”. The list narrows as you type.
4
Keep the word
Press Enter. The word becomes a dashed only chip. The list keeps just the services that also mention it. Add more words the same way.

Before Enter, typing narrows the services already loaded. Enter asks MOTOR.
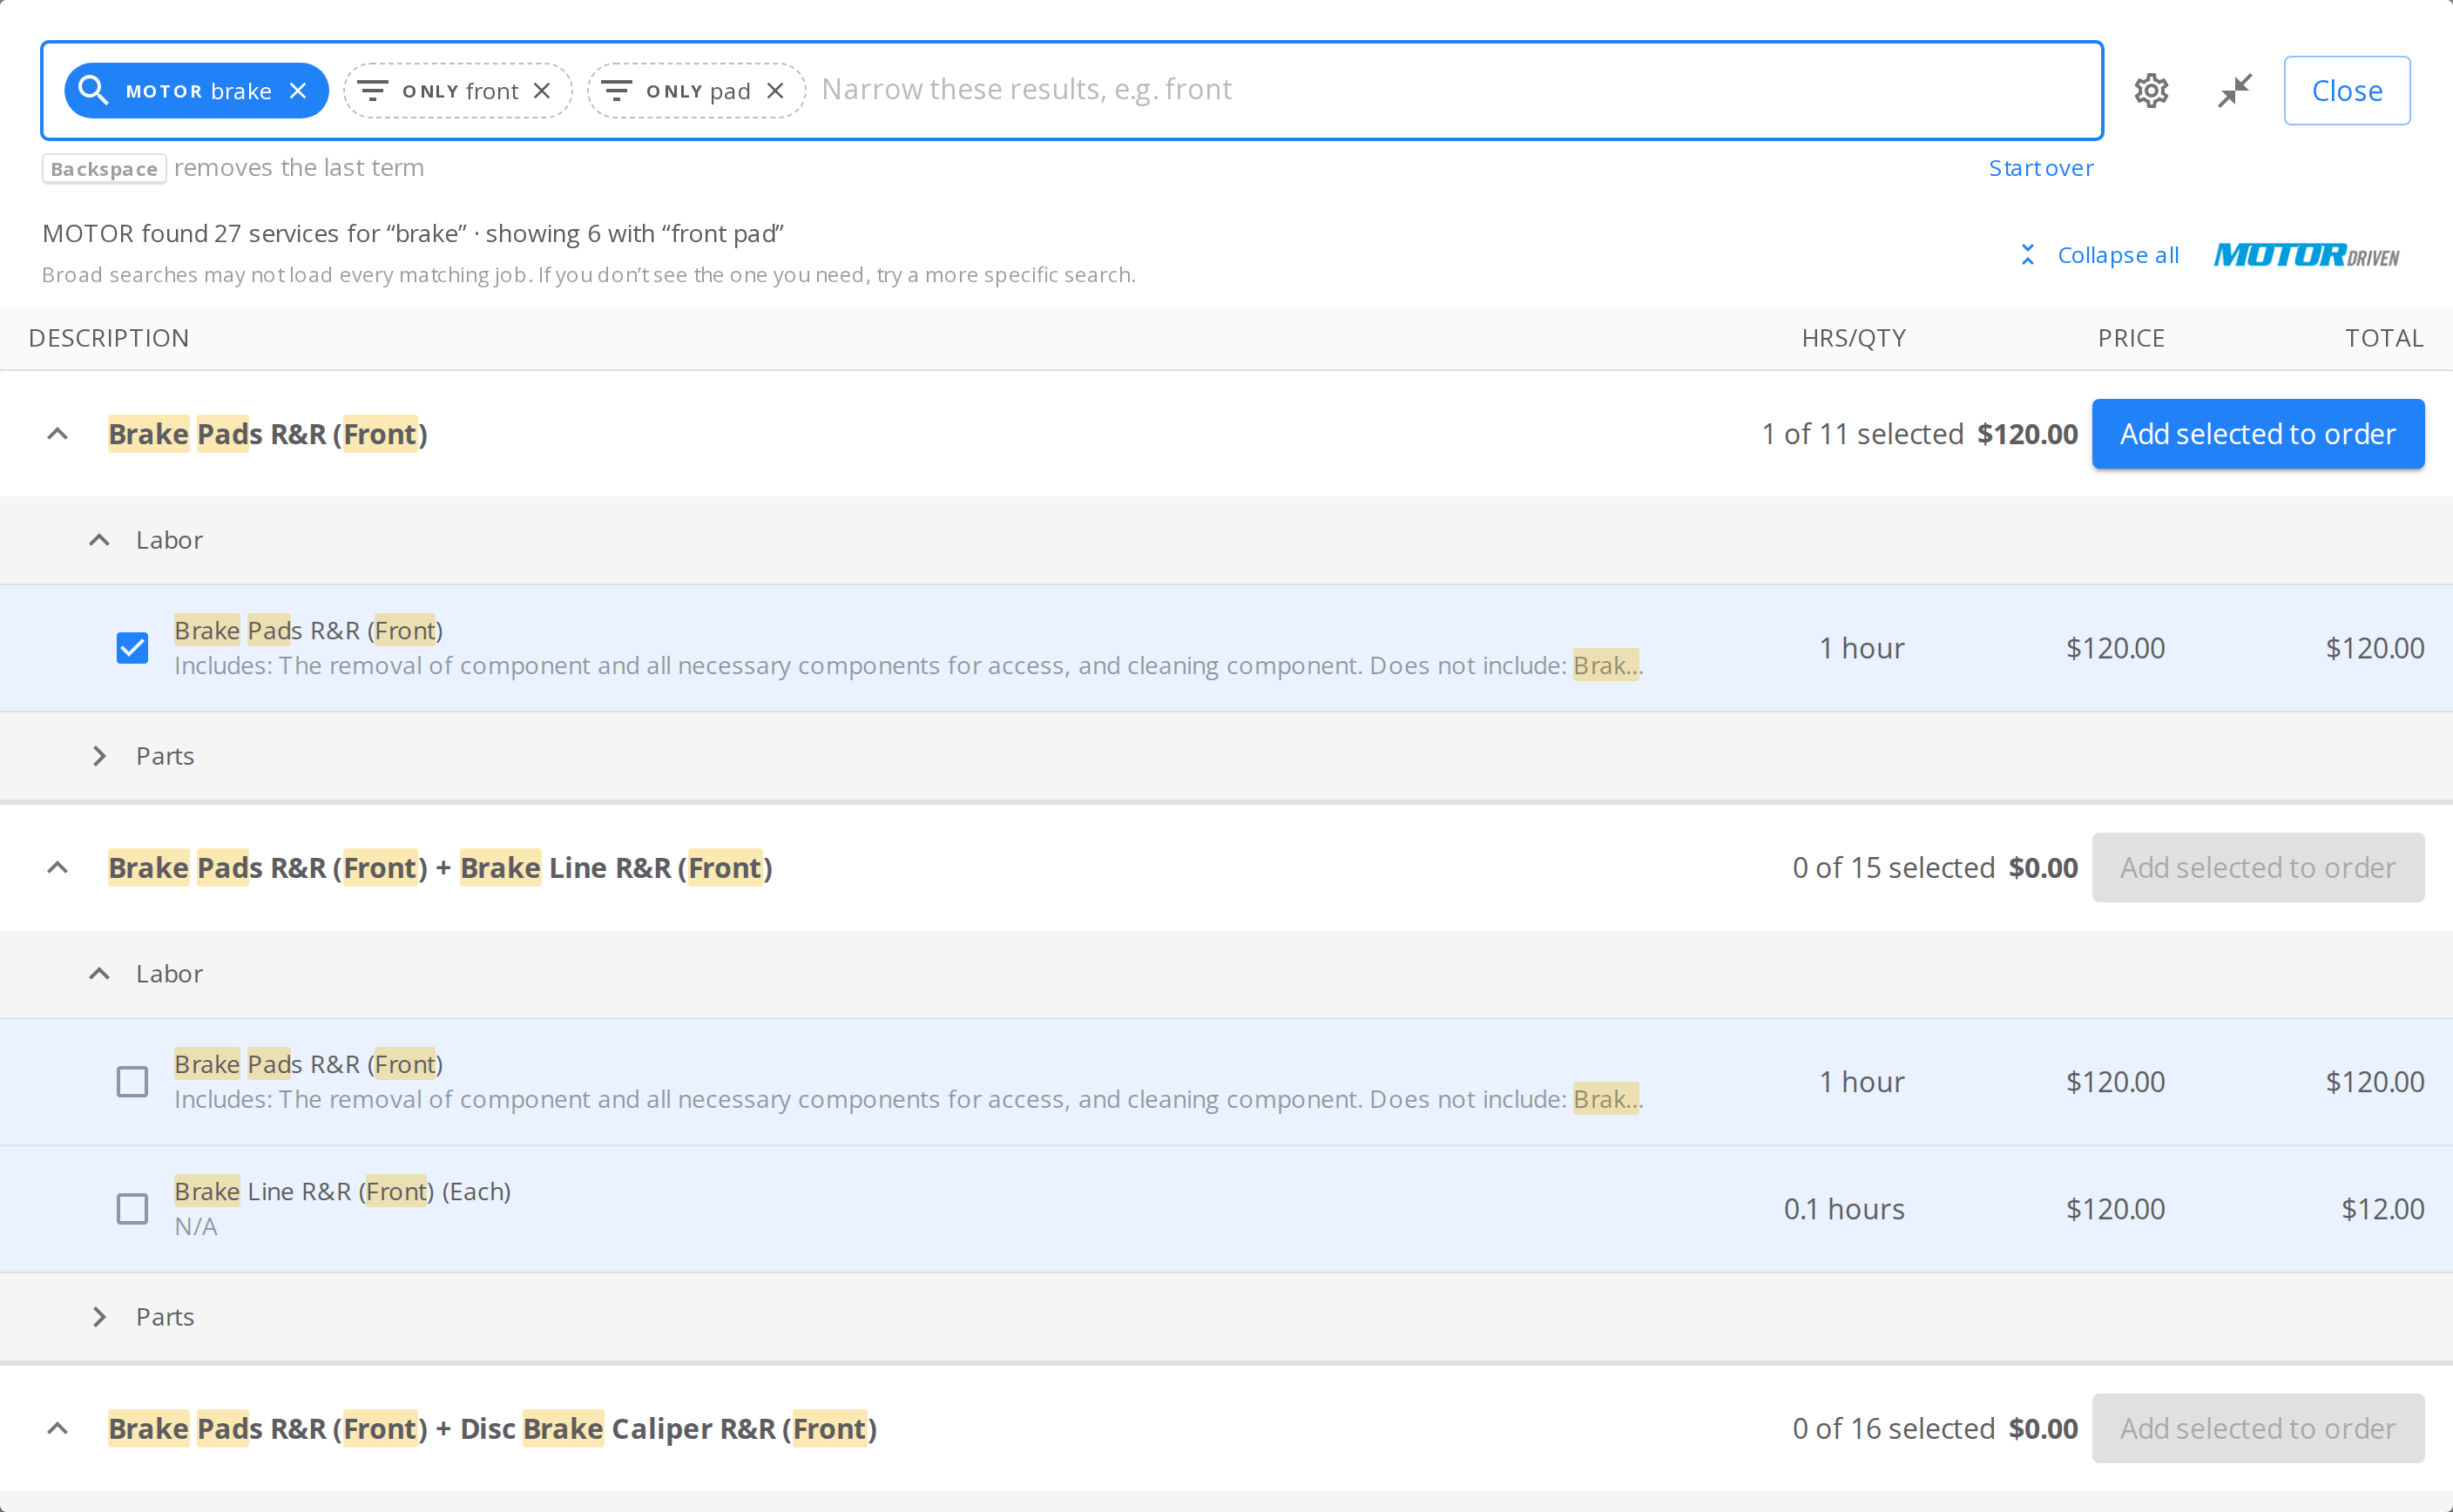
MOTOR was asked for brake. The front and pad chips narrow those results.
Show the lines a word hides
A service that matches shows only its matching lines. When a word hides some of a service’s lines, a Matching | All toggle appears next to the service. Select All to see every line of that service. Select Matching to hide the other lines again.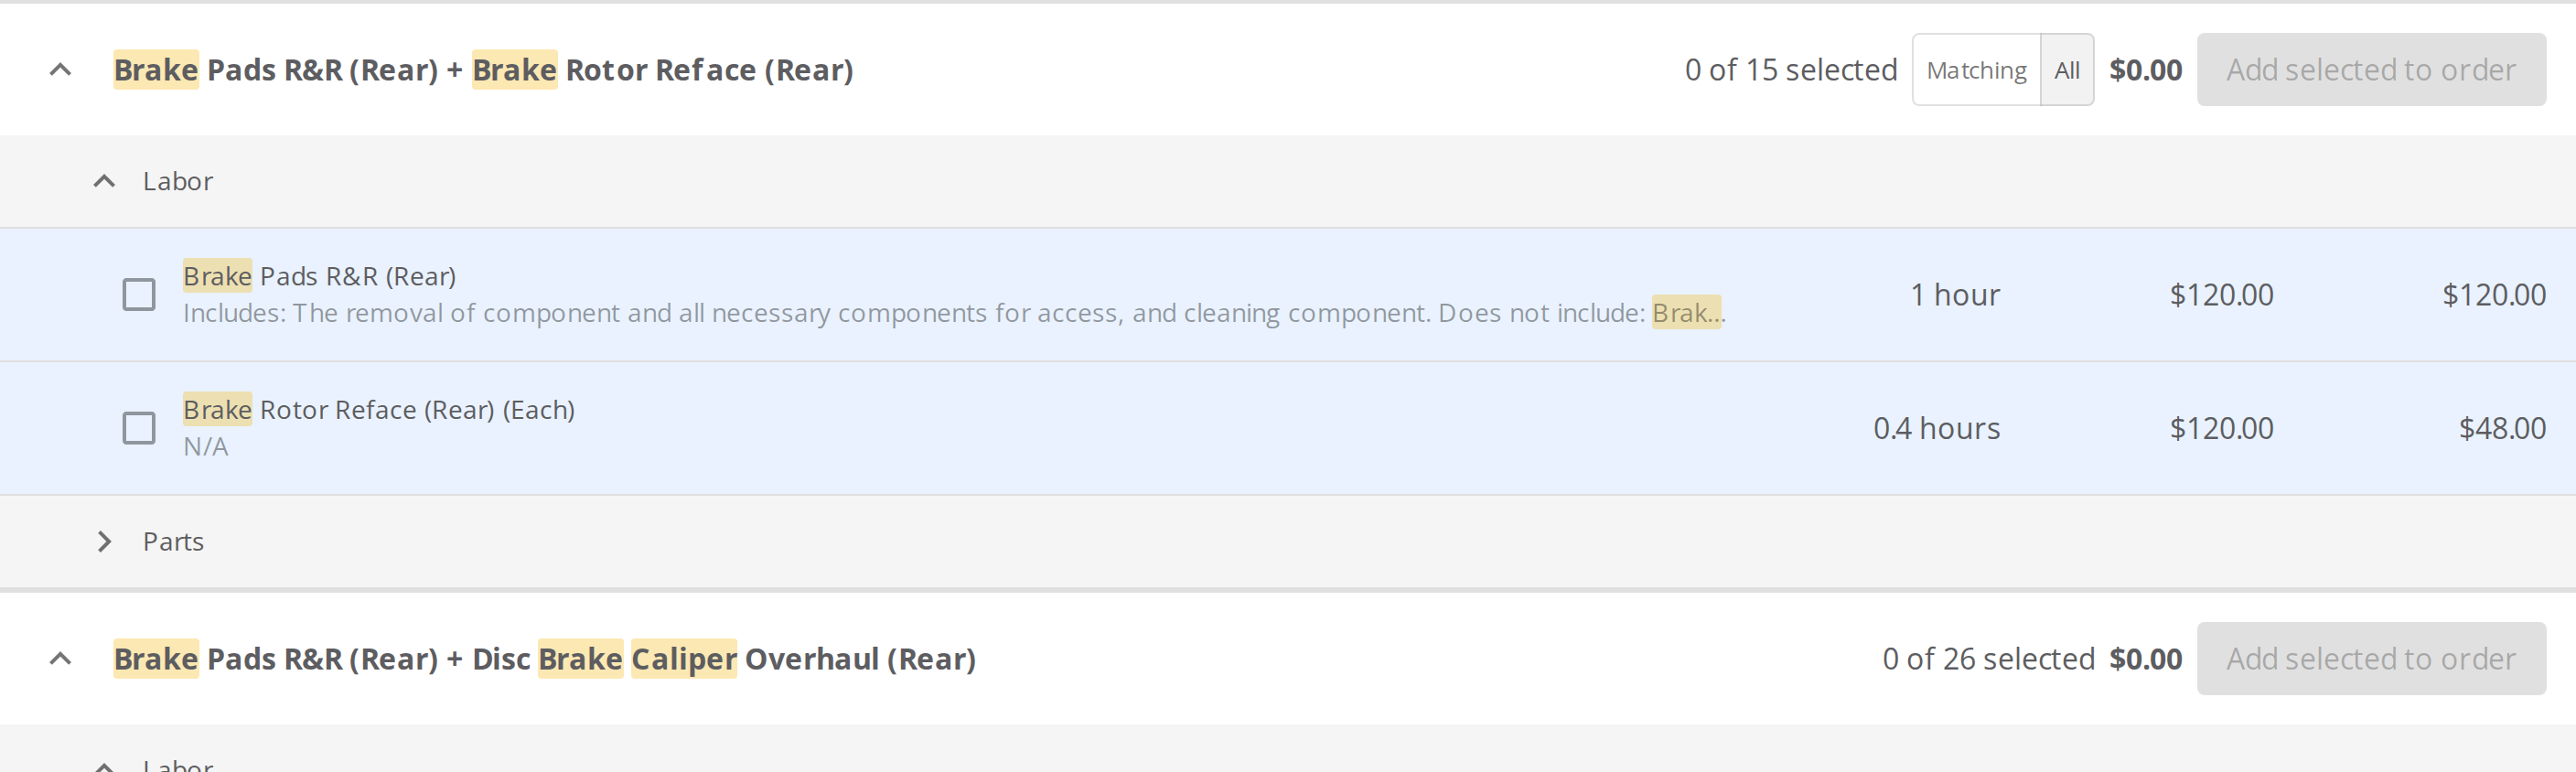
The caliper chip hides the lines of this rear brake job that don't mention caliper. All shows them again.
Fold or open every service
Select Collapse all in the bar above the list to fold every service to one row. The button then reads Expand all. Select it to open every service again. To open or close one service, select the arrow next to its name. To show or hide a section, select the arrow next to Tires, Labor, Parts or Fees. The arrows also work while chips narrow the results. A long line description shows on one line. Select it to read the full text. Select it again to fold it.Change or clear the search
- Remove a word: select the X on its chip. Or press Backspace in the empty bar to remove the last chip.
- Search MOTOR for something else: type the job. Under the bar, select Search MOTOR for … instead.
- Start over: select Start over under the bar. The dialog clears every chip and lists the first jobs for the vehicle again.
Choose how the results look
1
Open the preferences
Select the cog button next to the search bar.
2
Choose what starts collapsed
Turn on Collapsed by default for Services, Tires, Labor, Parts or Fees. A collapsed service shows only its name. A collapsed section shows only its heading.
3
Choose the spacing
Under List spacing, select Comfortable or Compact.
4
Choose the window size
Under Window size, select Large to fill the screen with results. Select Standard for a smaller window, with the work order around it.
5
Choose what happens after adding
Under After adding, select Close the search to go back to the order after each add. Select Keep it open to add several services from one search.
6
Save the preferences
Select Save. To keep the old settings, select Cancel.
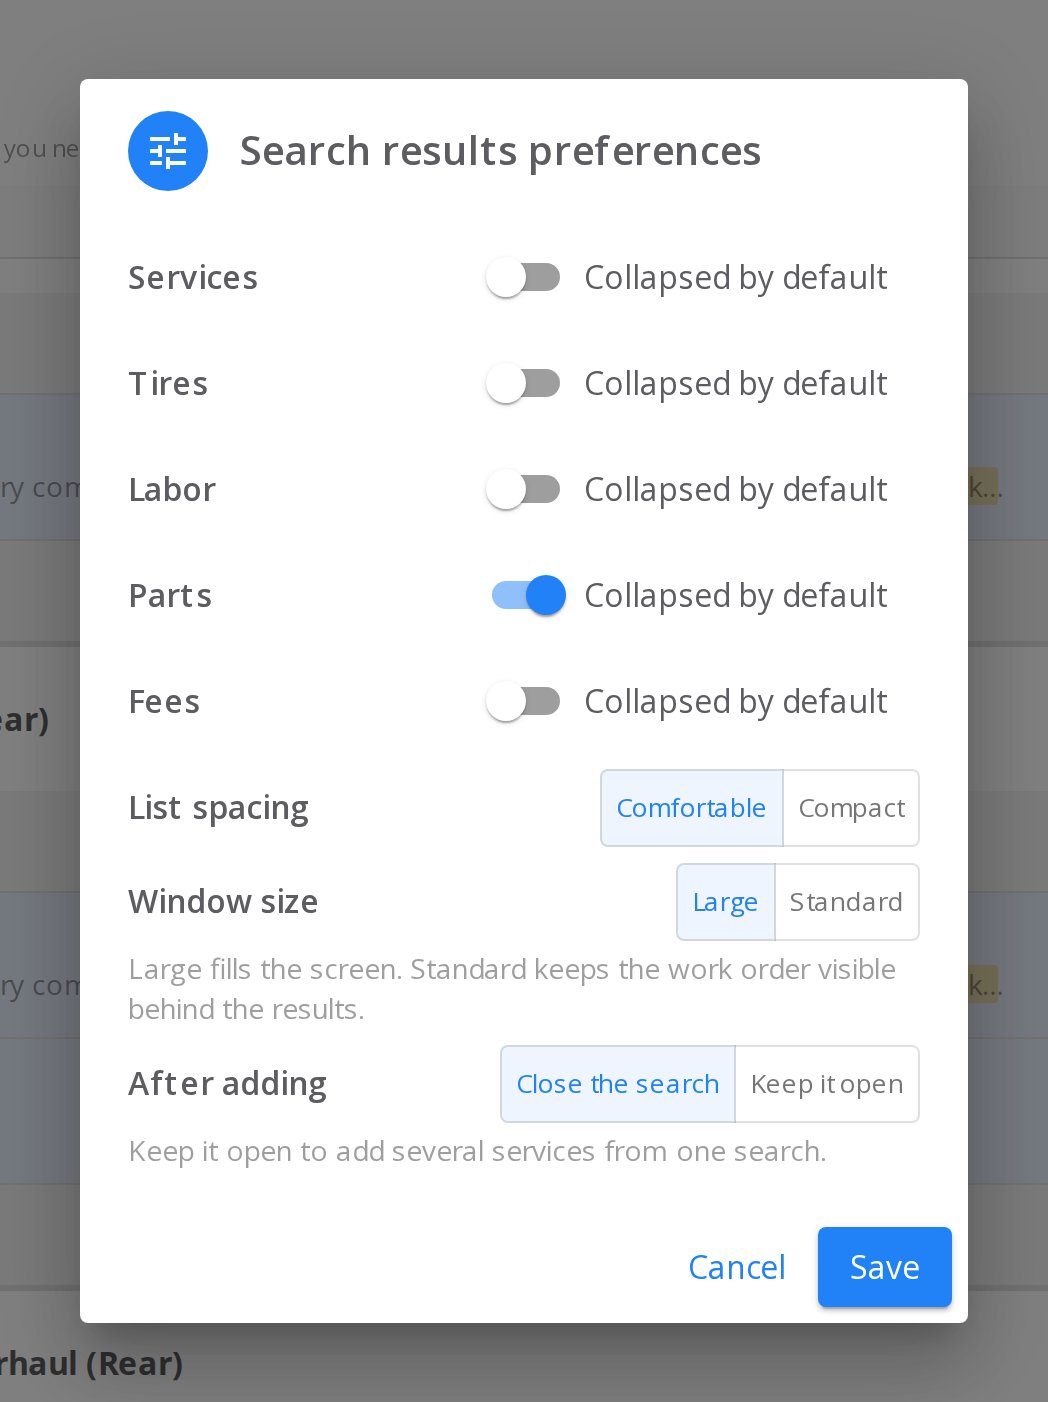
Search results preferences, with the default choices selected.
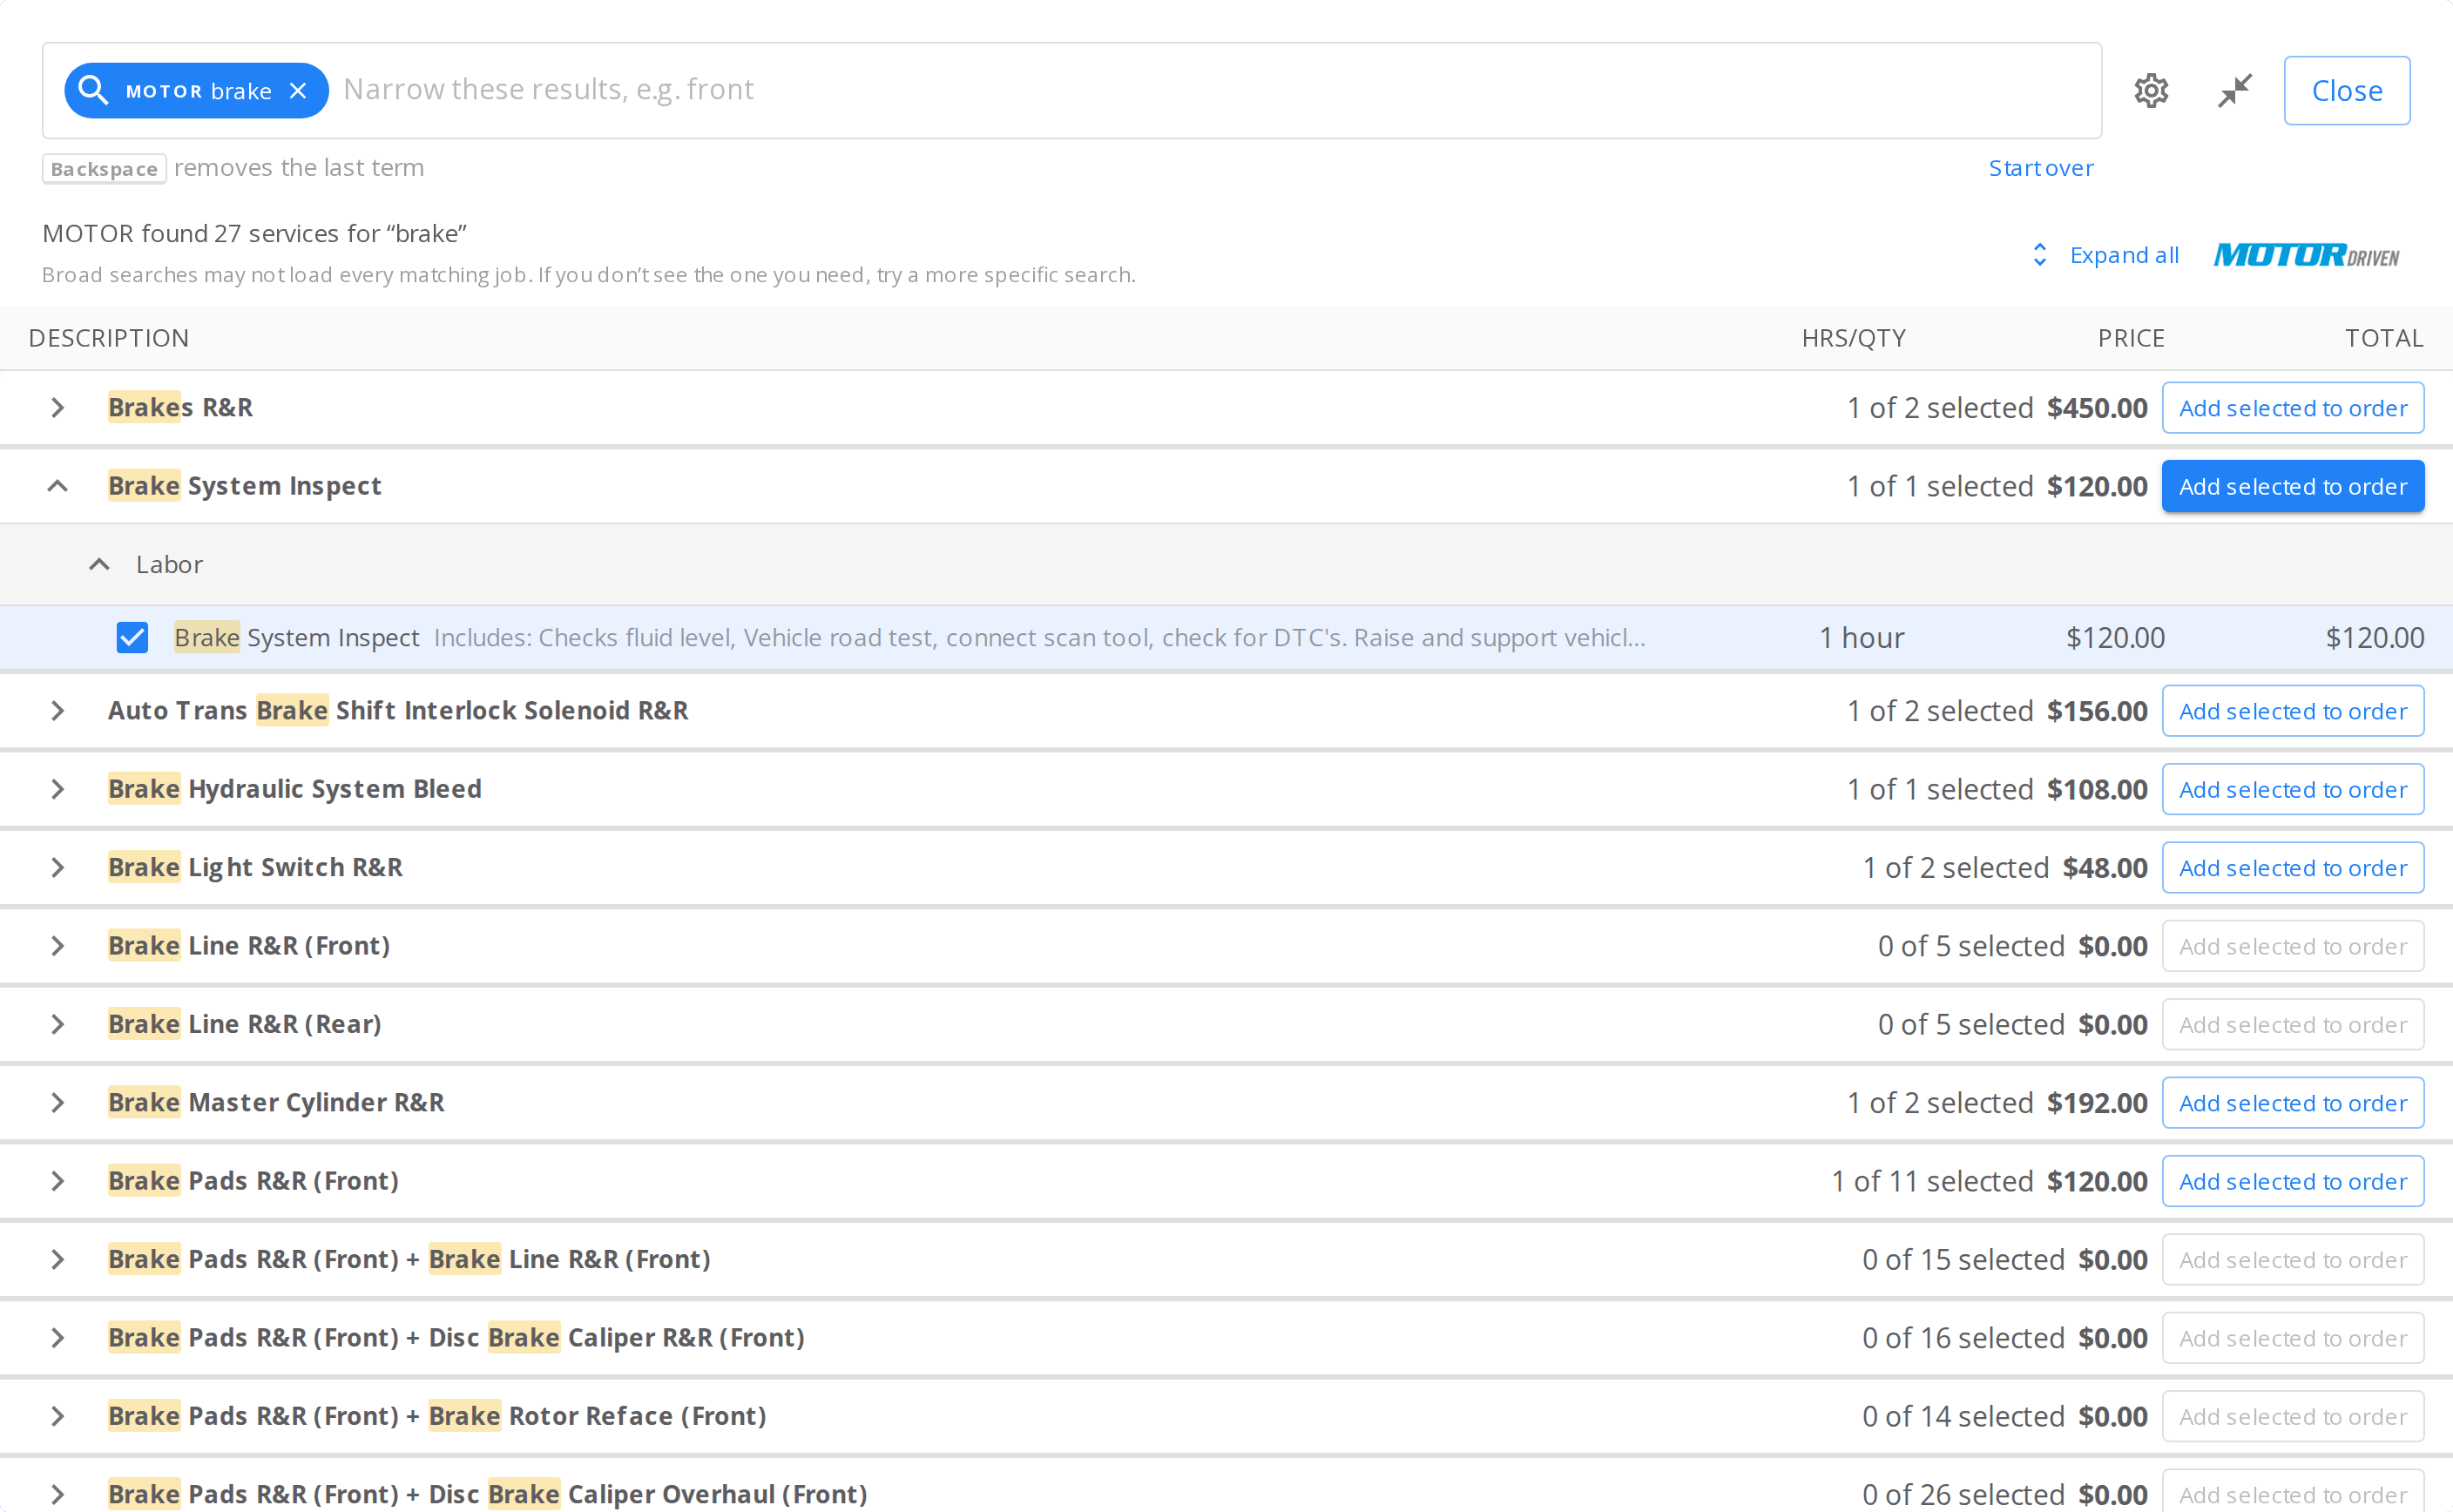
Services collapsed, Compact spacing, with one service open.
If it doesn’t work
- Typing does not find a job. Typing narrows only the services already in the list. Press Enter to ask MOTOR.
- A job you need is not in the list. The dashed only chips narrow what MOTOR returned. They never search again. Select Start over. Then search MOTOR for the job by name.
- A job you expected is not in an empty or broad search. Only the first pages load. Search for the job by name.
- A line you need is missing from a service. Select All on the Matching | All toggle next to the service.
- Your preferences are gone. Preferences stay in one browser on one computer. Set them again in each browser you use.
Still need help?
Contact support through the contact form, or call 855-400-4521.Where to go next
Sending estimates to customers
Send the estimate to your customer for approval.
Ordering parts with PartsTech
Order the parts a job needs from your suppliers.